 All posts

Hosting Next.js with Cloudflare
A practical guide to deploying Next.js applications on Cloudflare Workers using OpenNext, covering environment variables, observability, and integrating services like Workers KV and R2.
Background.
I had been working on a website for my friend's clothing shop, and thought of using Next.js for 2 reasons
- Rapid development
- Having both the frontend and backend in a single application, without having to manage and deploy a separate backend.
While deploying the application to Cloudflare Workers using OpenNext , I came across a few things worth sharing.
Environment variables.
- You can have runtime as well as build environment variables added
- It's important to understand the difference because using the wrong type can lead to unexpected behavior during deployment.
Build-time environment variables
These are environment variables whose values are required during the build process.
const siteUrl = process.env.NEXT_PUBLIC_BASE_URLRuntime environment variables
These are environment variables that your application accesses when handling requests at runtime.
export function getBrevoClient() {
  return new BrevoClient({
    apiKey: process.env.BREVO_API_KEY!,
  })
}
Where do you configure these variables?
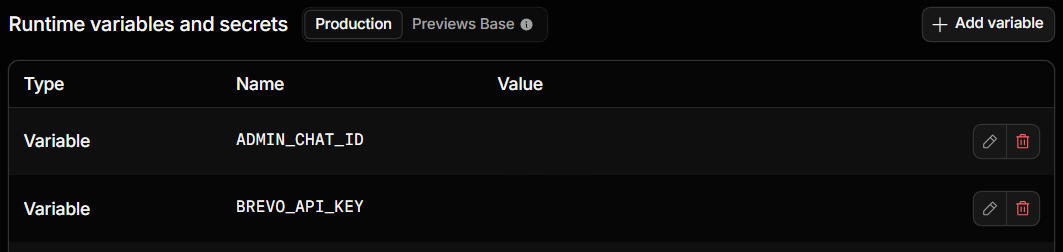
Here how you add build time variable
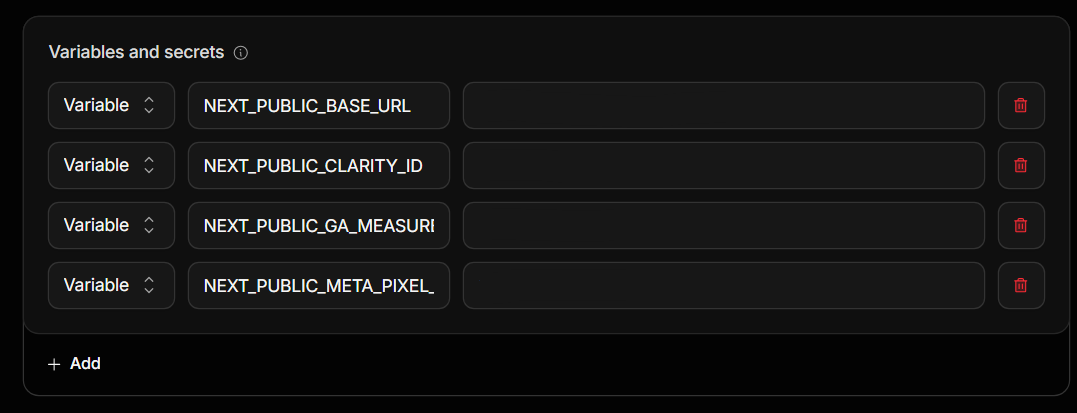
A few things to remember
When you configure environment variables through the dashboard directly, there's something you should remember. By default wrangler treats your wrangler file as the source of truth, meaning when you deploy new code, your variables added in dashboard is overridden or removed. This is what I found:
By default, the Wrangler configuration file is the source of truth for your environment configuration, like a terraform file. If you change your vars in the dashboard, wrangler will override/delete them on its next deploy.
So, in your wrangler.jsonc file, add
"keep_vars": true,Setting up logs
If you want to view your application's logs, including console.log() statements, in the Cloudflare dashboard, you need to enable Workers Observability.
This piece of code in wrangler.jsonc sets it up
  "observability": {
    "logs": {
      "enabled": true,
      "invocation_logs": true,
    },
  },
The "invocation_logs" collects data like incoming requests, such as the HTTP method and request URL, along with response and execution metadata.
This is particularly useful because you don't have to implement your own logging just to see basic request-level information.
You can still use console.log() , console.warn() and console.error() to log application-specific information. These will also show up in Workers Logs.
Accessing other Cloudflare services in workers
One of the things I really like about Cloudflare Workers is how easily you can integrate other Cloudflare services into your application.
You add all the services you want in wrangler.jsonc. And accessing these services are very easy.
Workers KV
KV is a global, low-latency, key-value data store. It stores data in a small number of centralized data centers
If you want to set it up, create Workers KV in dashboard, then in wrangler.jsonc add
  "kv_namespaces": [
    {
      "binding": "LOW_STOCK",
      "id": "id-of-LOW_STOCK",
    },
    {
      "binding": "LIMITED_TIME_DEAL",
      "id": "id-of-LIMITED_TIME_DEAL",
    },
  ],
Once configured, you can access the namespace through its binding and perform operations such as get, put, delete and list.
R2 Object Storage
Similarly, if you want object storage, Cloudflare provides R2, which is an S3-compatible object storage service.
Create R2 Object Storage in dashboard and in wrangler.jsonc add
  "r2_buckets": [
    {
      "binding": "PUBLIC_BUCKET",
      "bucket_name": "admin-blog-public",
    },
    {
      "binding": "PRIVATE_BUCKET",
      "bucket_name": "admin-blog-private",
    },
  ],
Accessing these bindings in Next.js
import { getCloudflareContext } from "@opennextjs/cloudflare"
const { env } = getCloudflareContext({ async: false })
Then use them as
const value = await env.LOW_STOCK.get("some-key")

await env.LOW_STOCK.put("some-key", "some-value")

await env.PUBLIC_BUCKET.put("image.png", imageBuffer)
That's it! You can access Cloudflare services directly from your Next.js server-side code without having to set up separate SDK clients or manage additional infrastructure.
Have Questions or Suggestions?
If you'd like me to dive deeper into any of these topics or cover something I haven't mentioned, feel free to reach out! I'm always happy to discuss, answer questions, or explore topics that might be useful to others.
You can get in touch with me through email or connect with me on LinkedIn.